

You set this up once. After you connect, GooseWorks is available in your normal Claude chats and in Cowork sessions — same account, same tools. You sign in with GooseWorks instead of copying a token.
Connect
1
Open connector settings
In your browser, go to claude.ai/new#settings/customize-connectors — this opens Claude’s connector settings directly. (You can also get there by clicking your name → Settings → Connectors.) Then click Add custom connector near the top.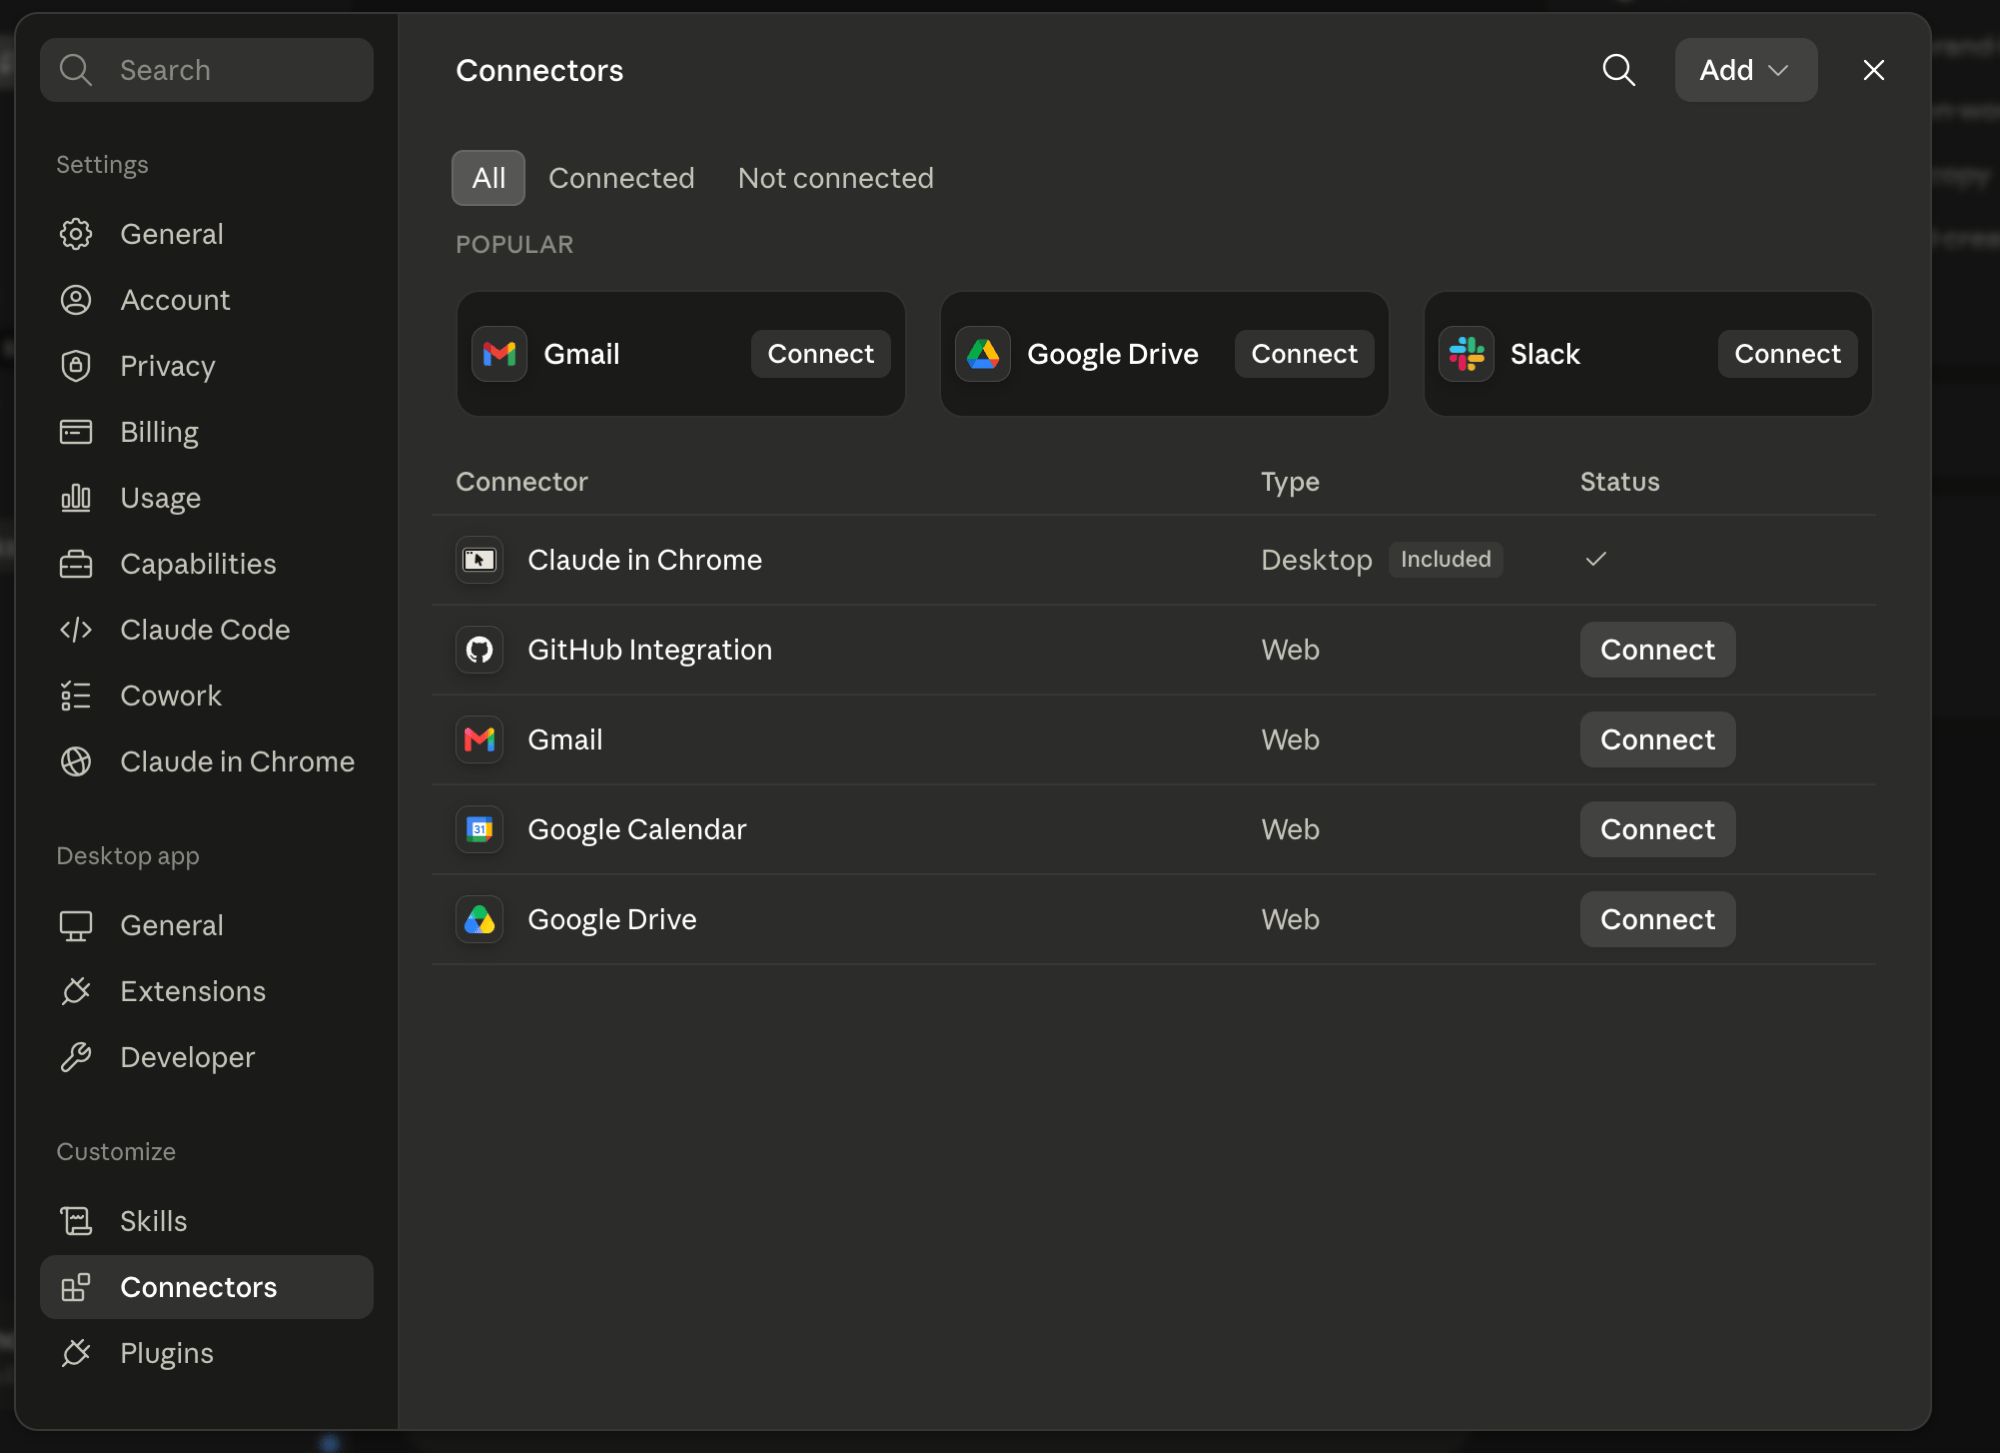
2
Enter the GooseWorks address
Give it the name Leave the other boxes empty and click Add.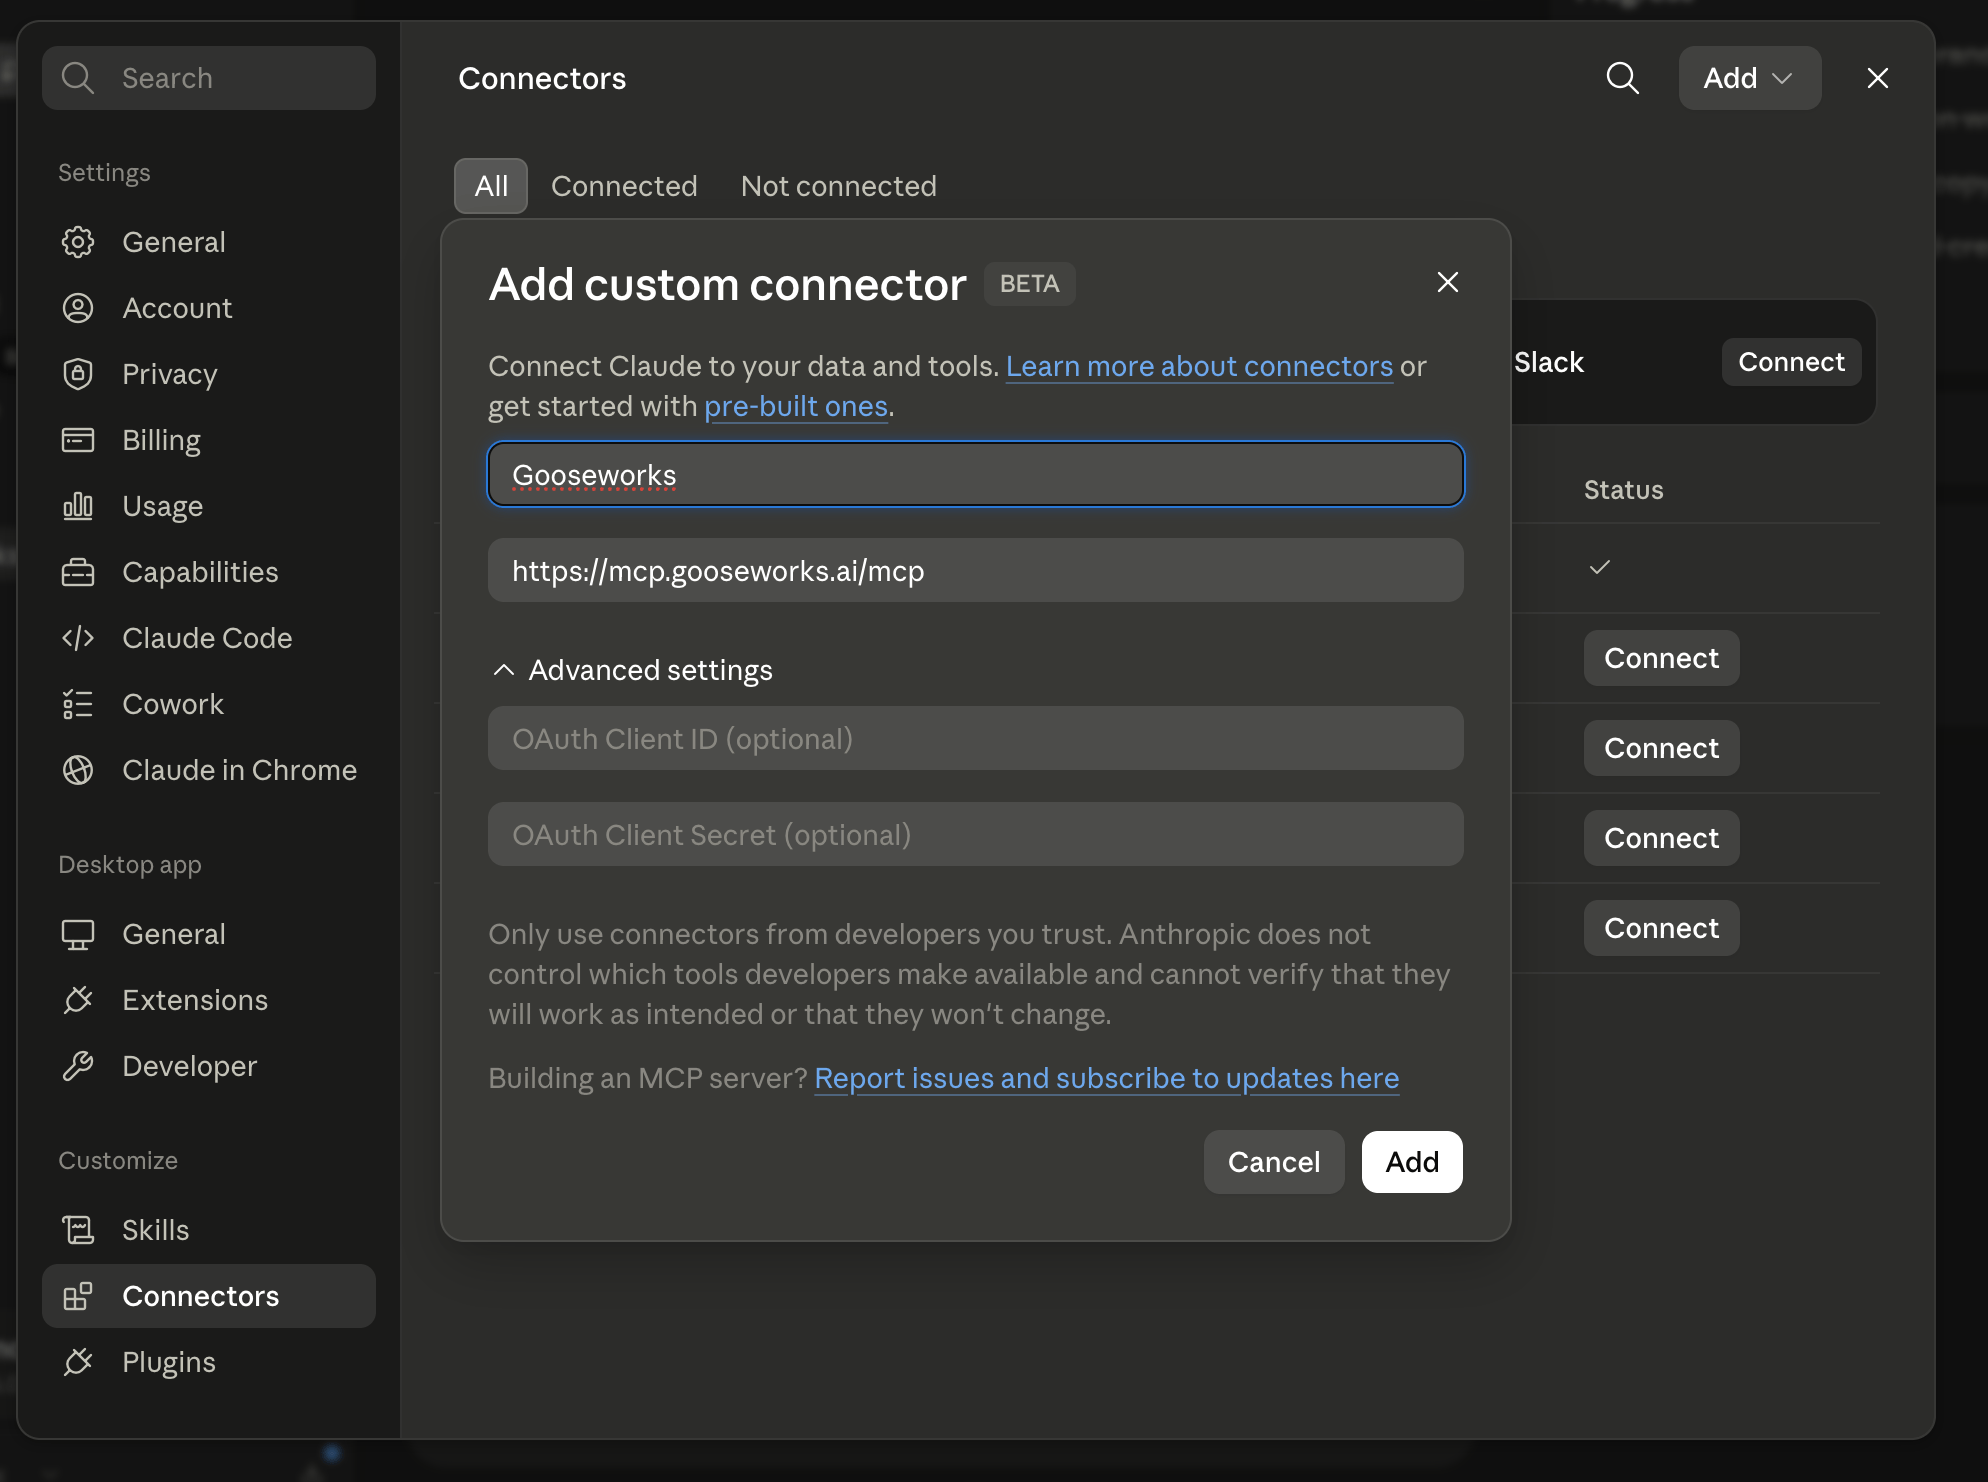
Gooseworks and paste this web address:3
Sign in with Google
Click Connect. Claude sends you to GooseWorks to sign in with Google — use the same account you use to log in to GooseWorks.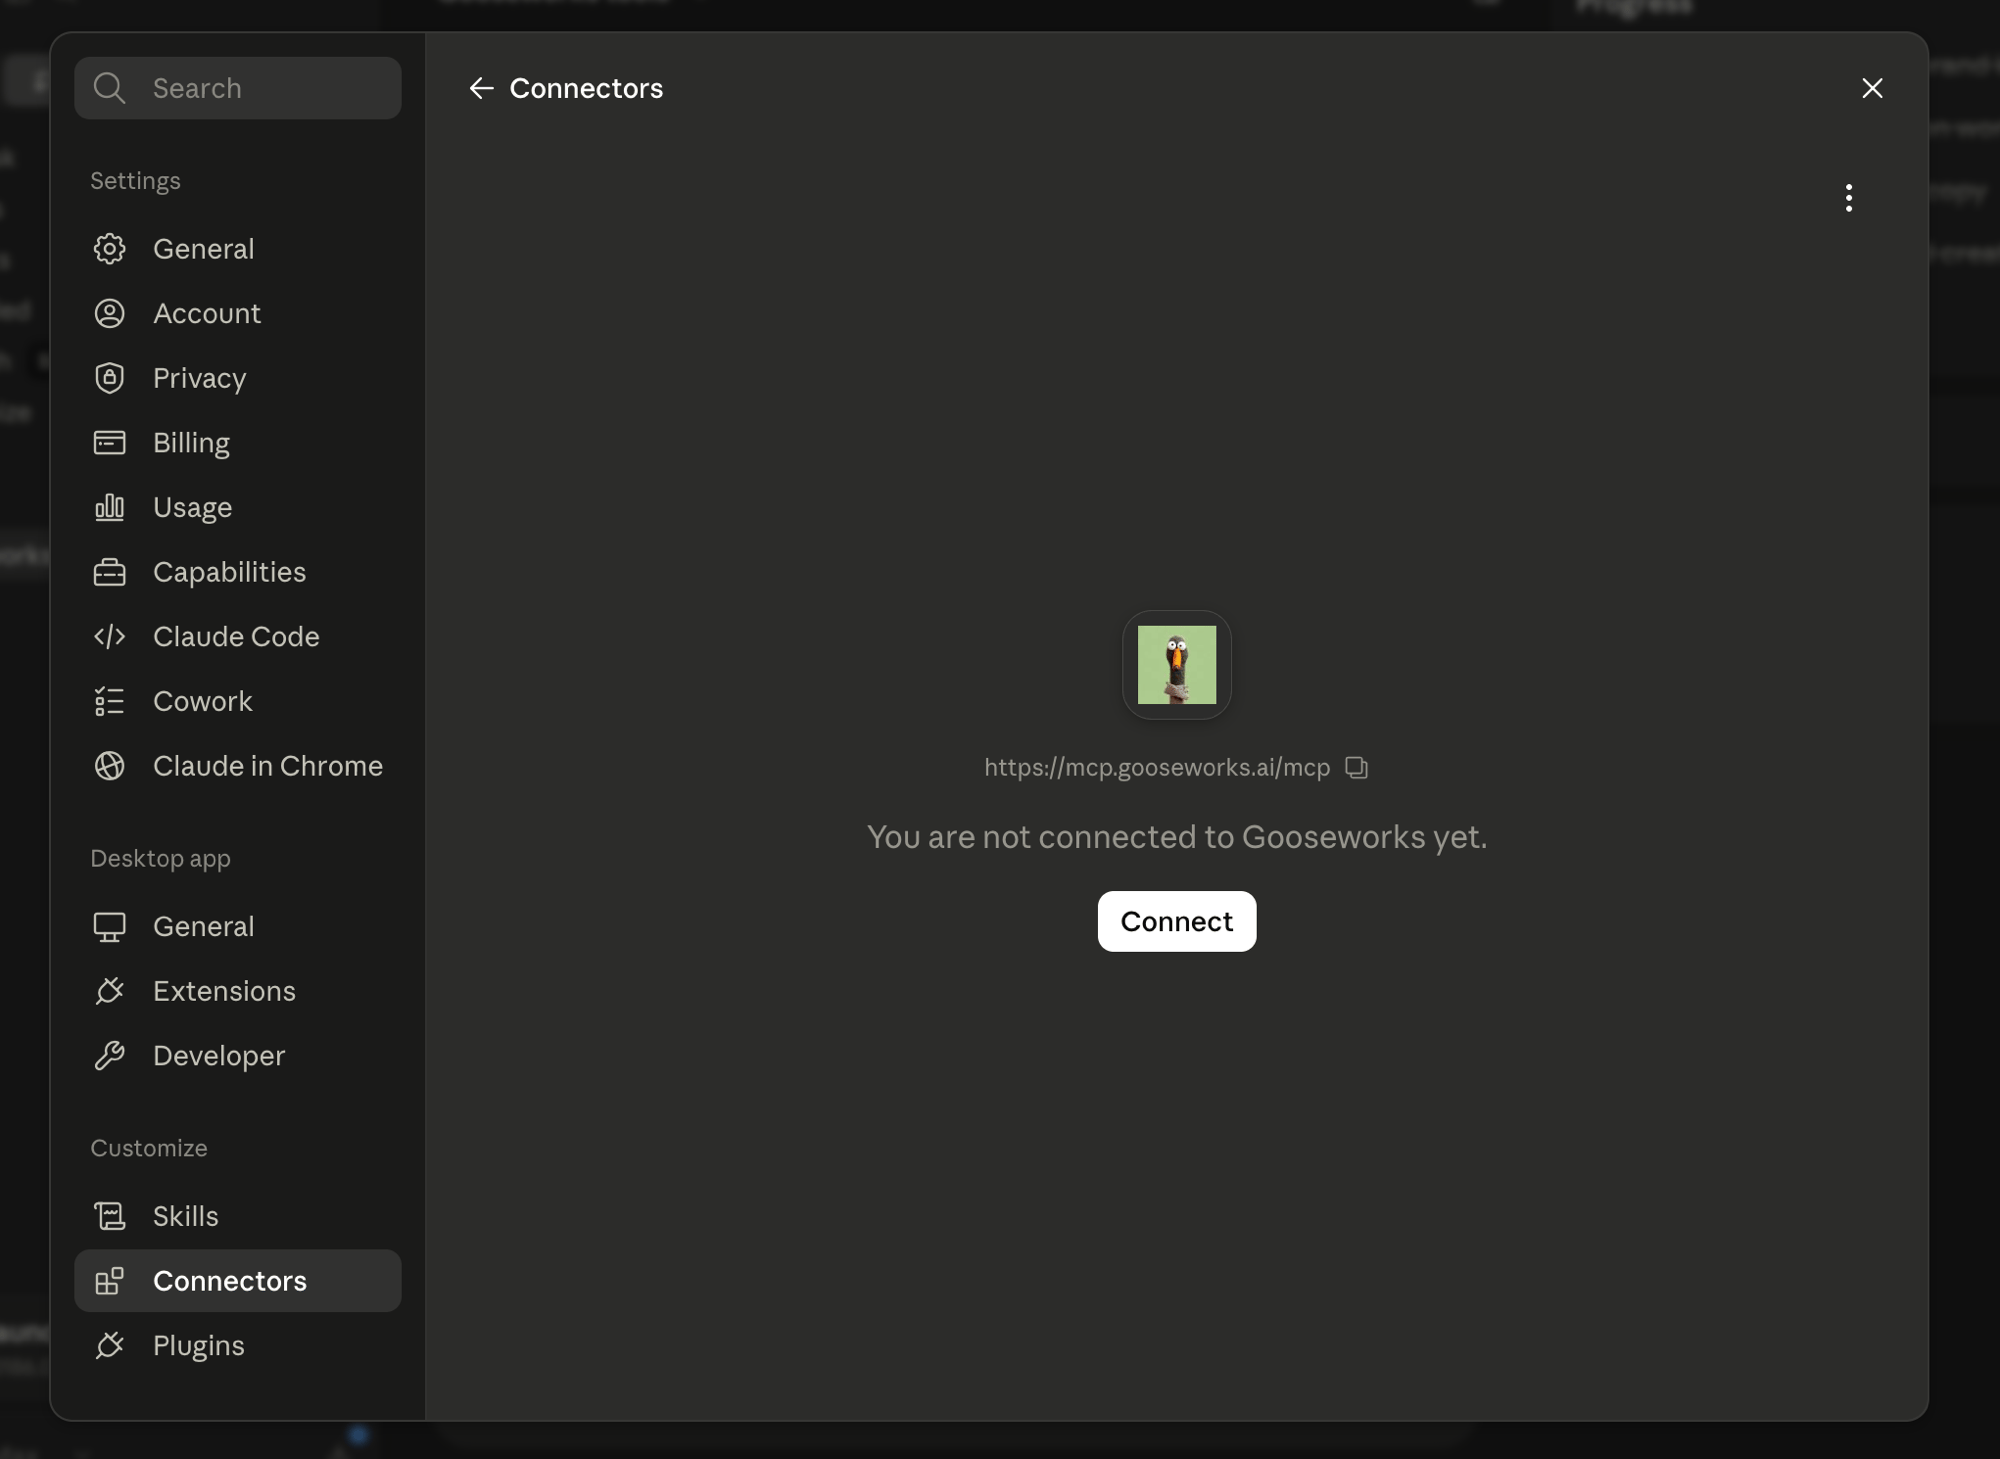
4
Allow access
You’ll see what GooseWorks will be allowed to do (make, edit, and analyze ads, use your workspaces, and spend ad credits). Click Allow.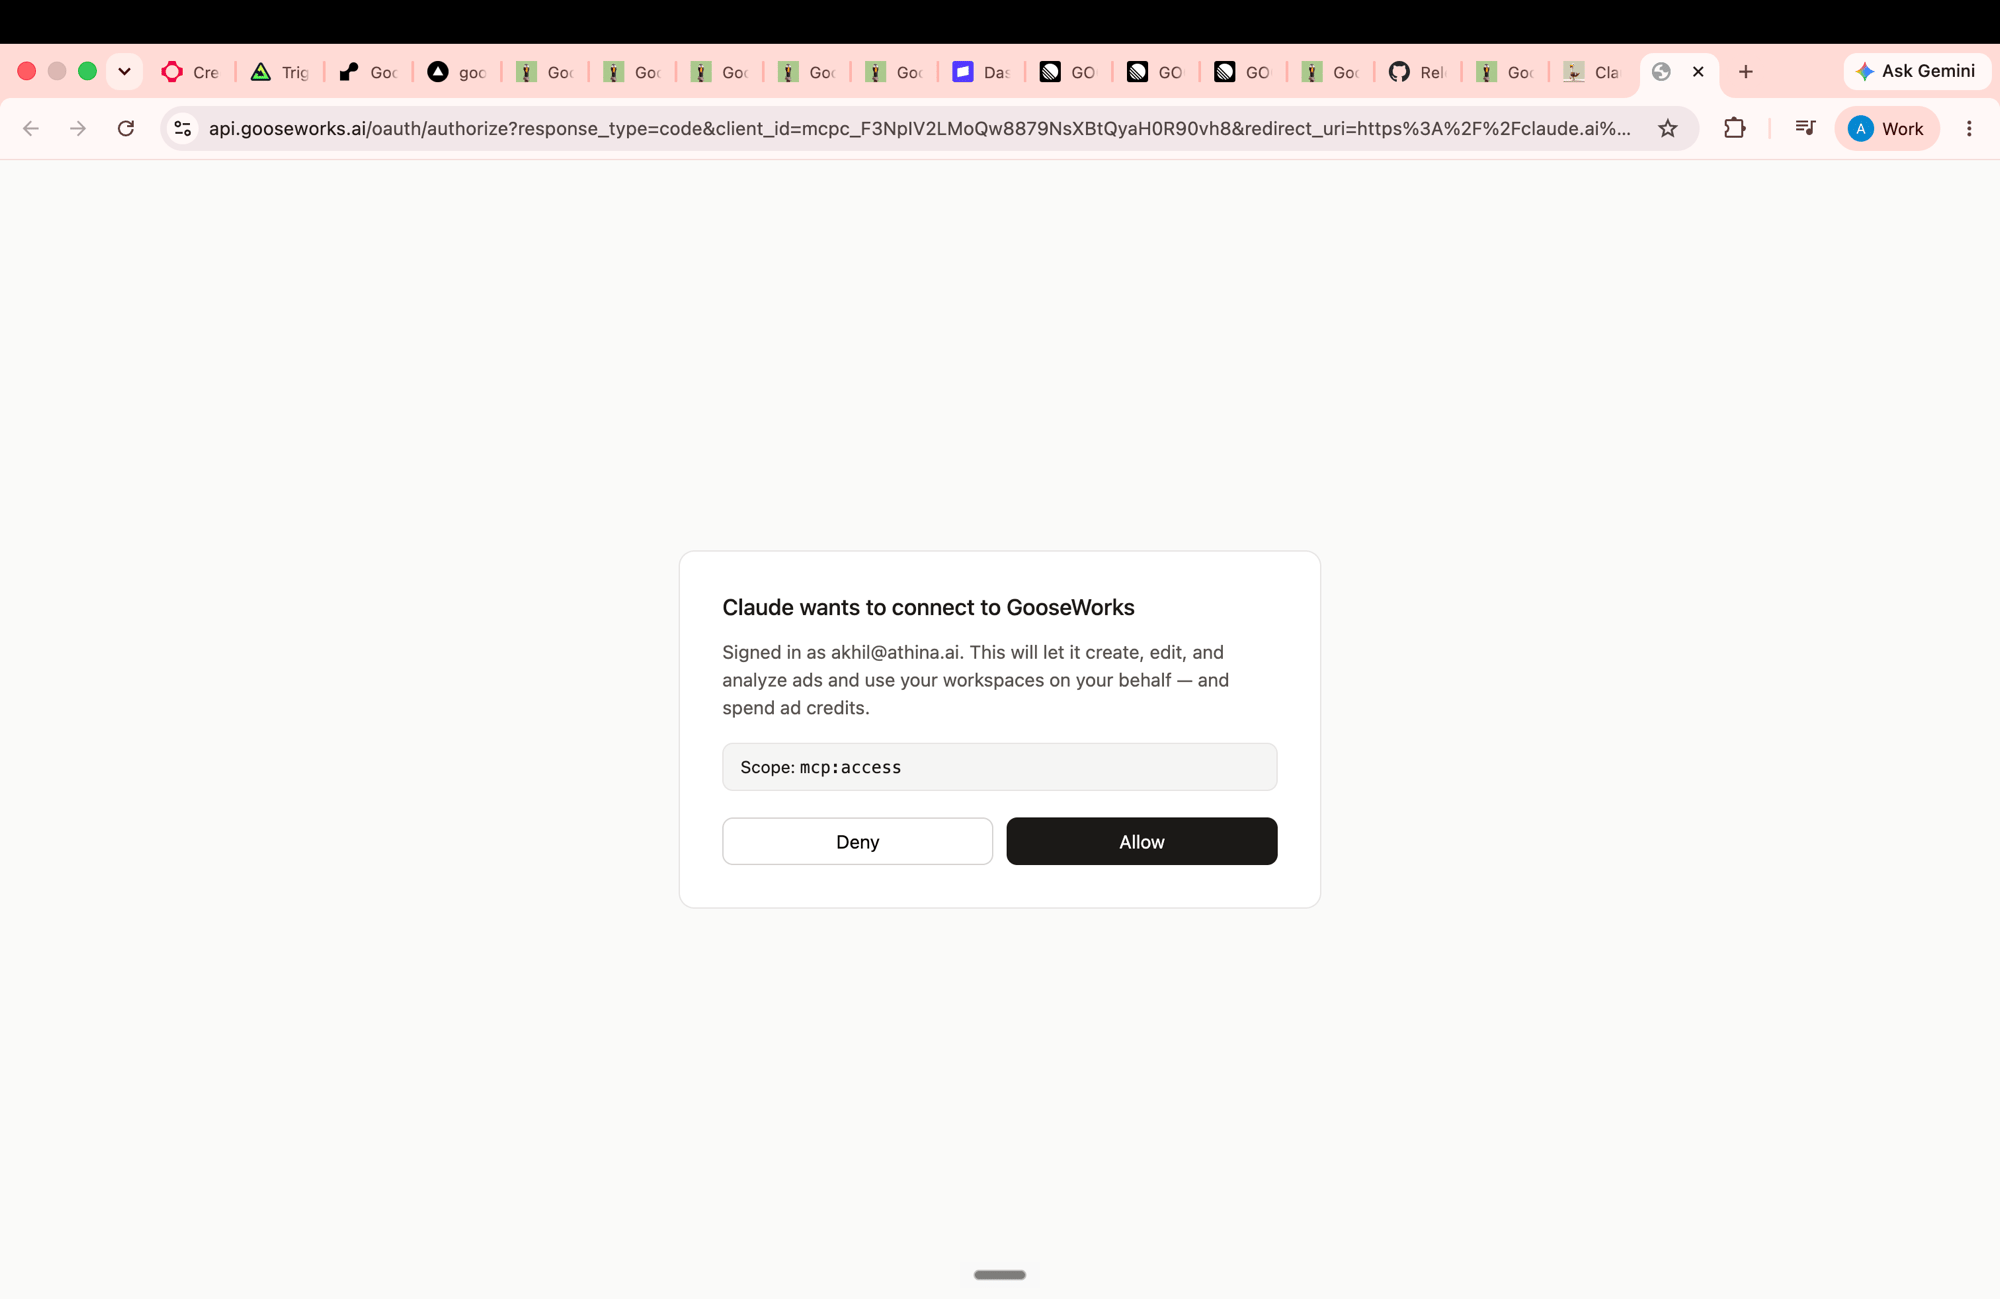
5
Go back to Claude
You’ll see a Connected message. Click Open Claude to return to the app.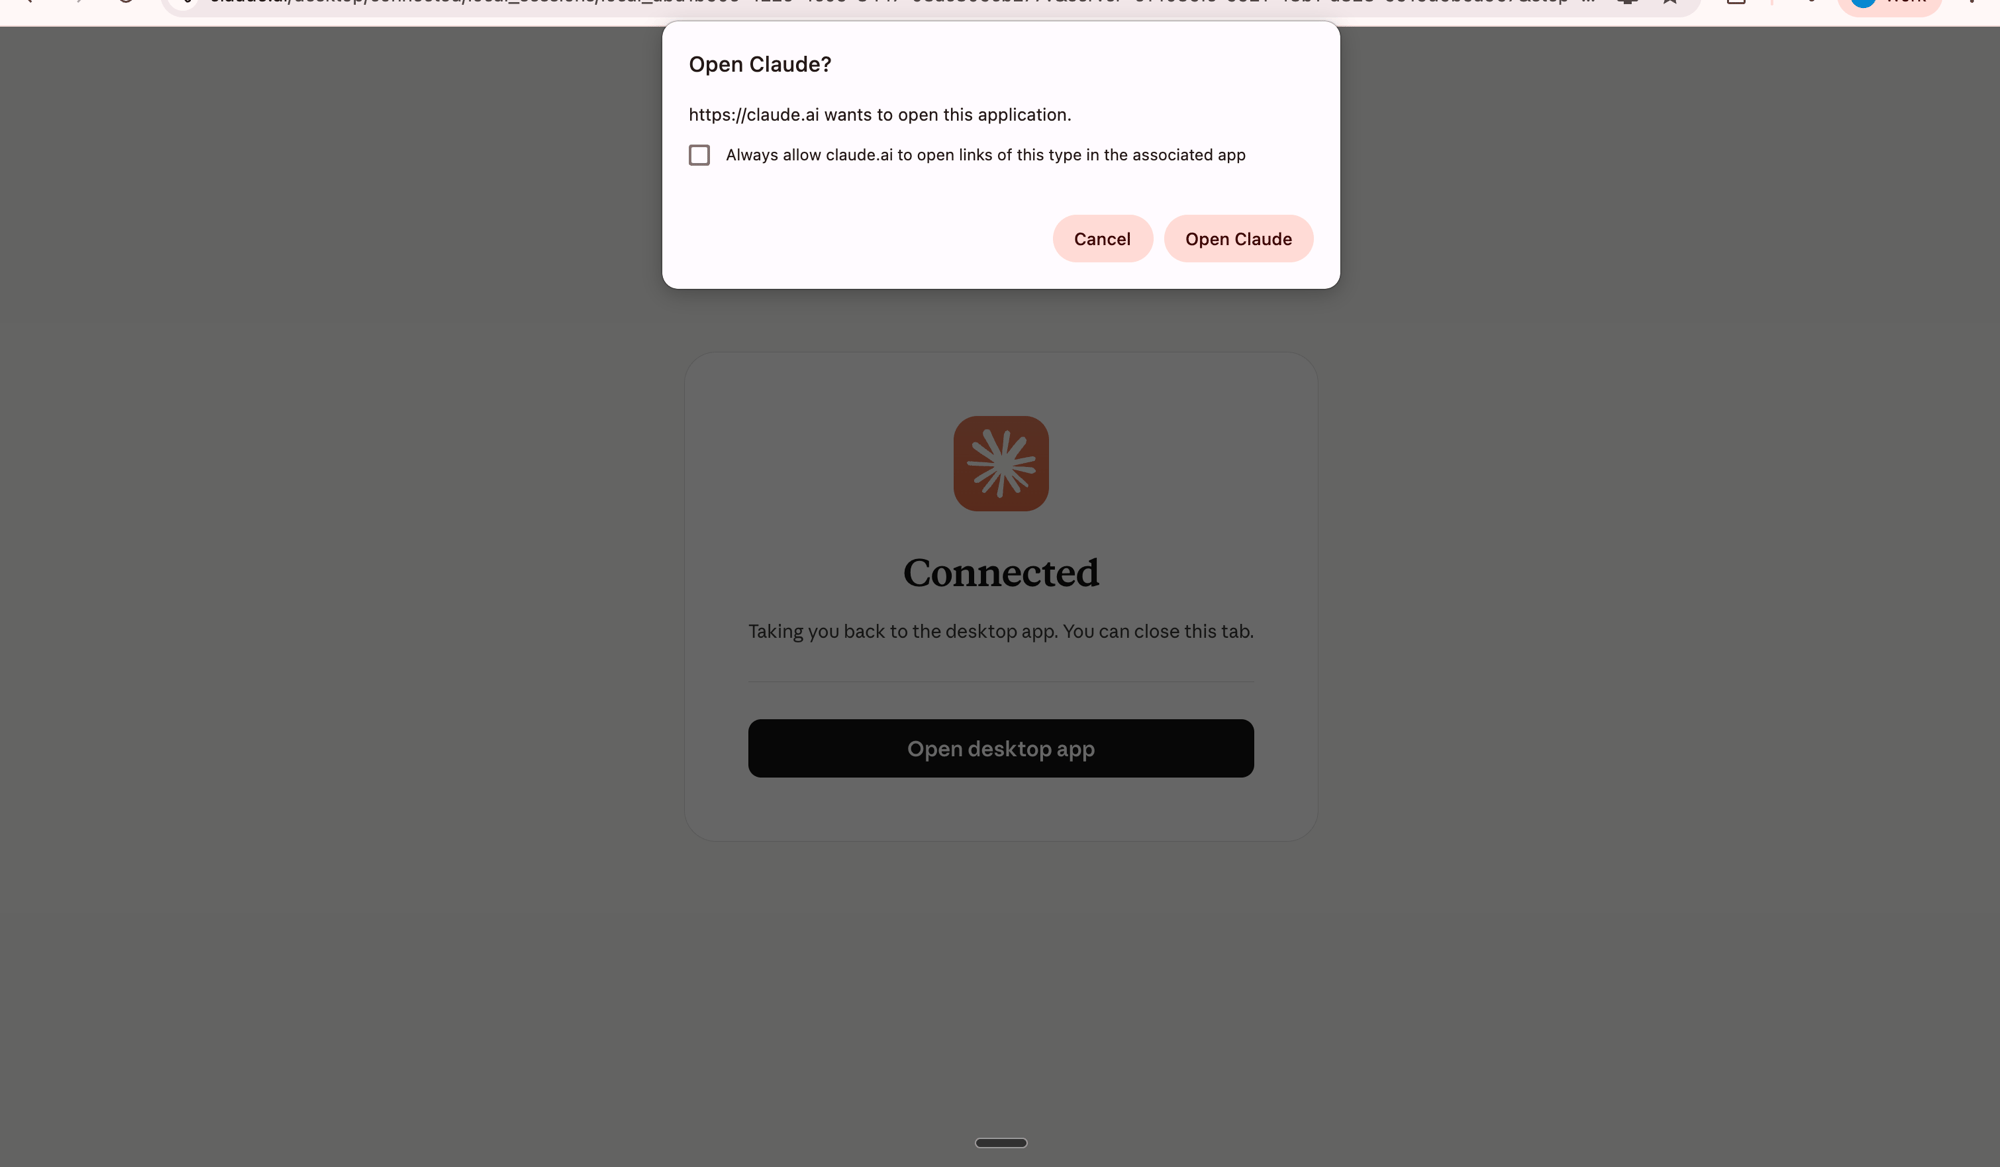
Be sure to click Open Claude — it takes you back so the connection finishes. When you reopen Settings → Connectors, GooseWorks will show as connected.
6
You're done
Back in Settings → Connectors, GooseWorks appears in the list with a checkmark. That’s it — no token to copy. Just ask Claude to use GooseWorks in any chat or Cowork session.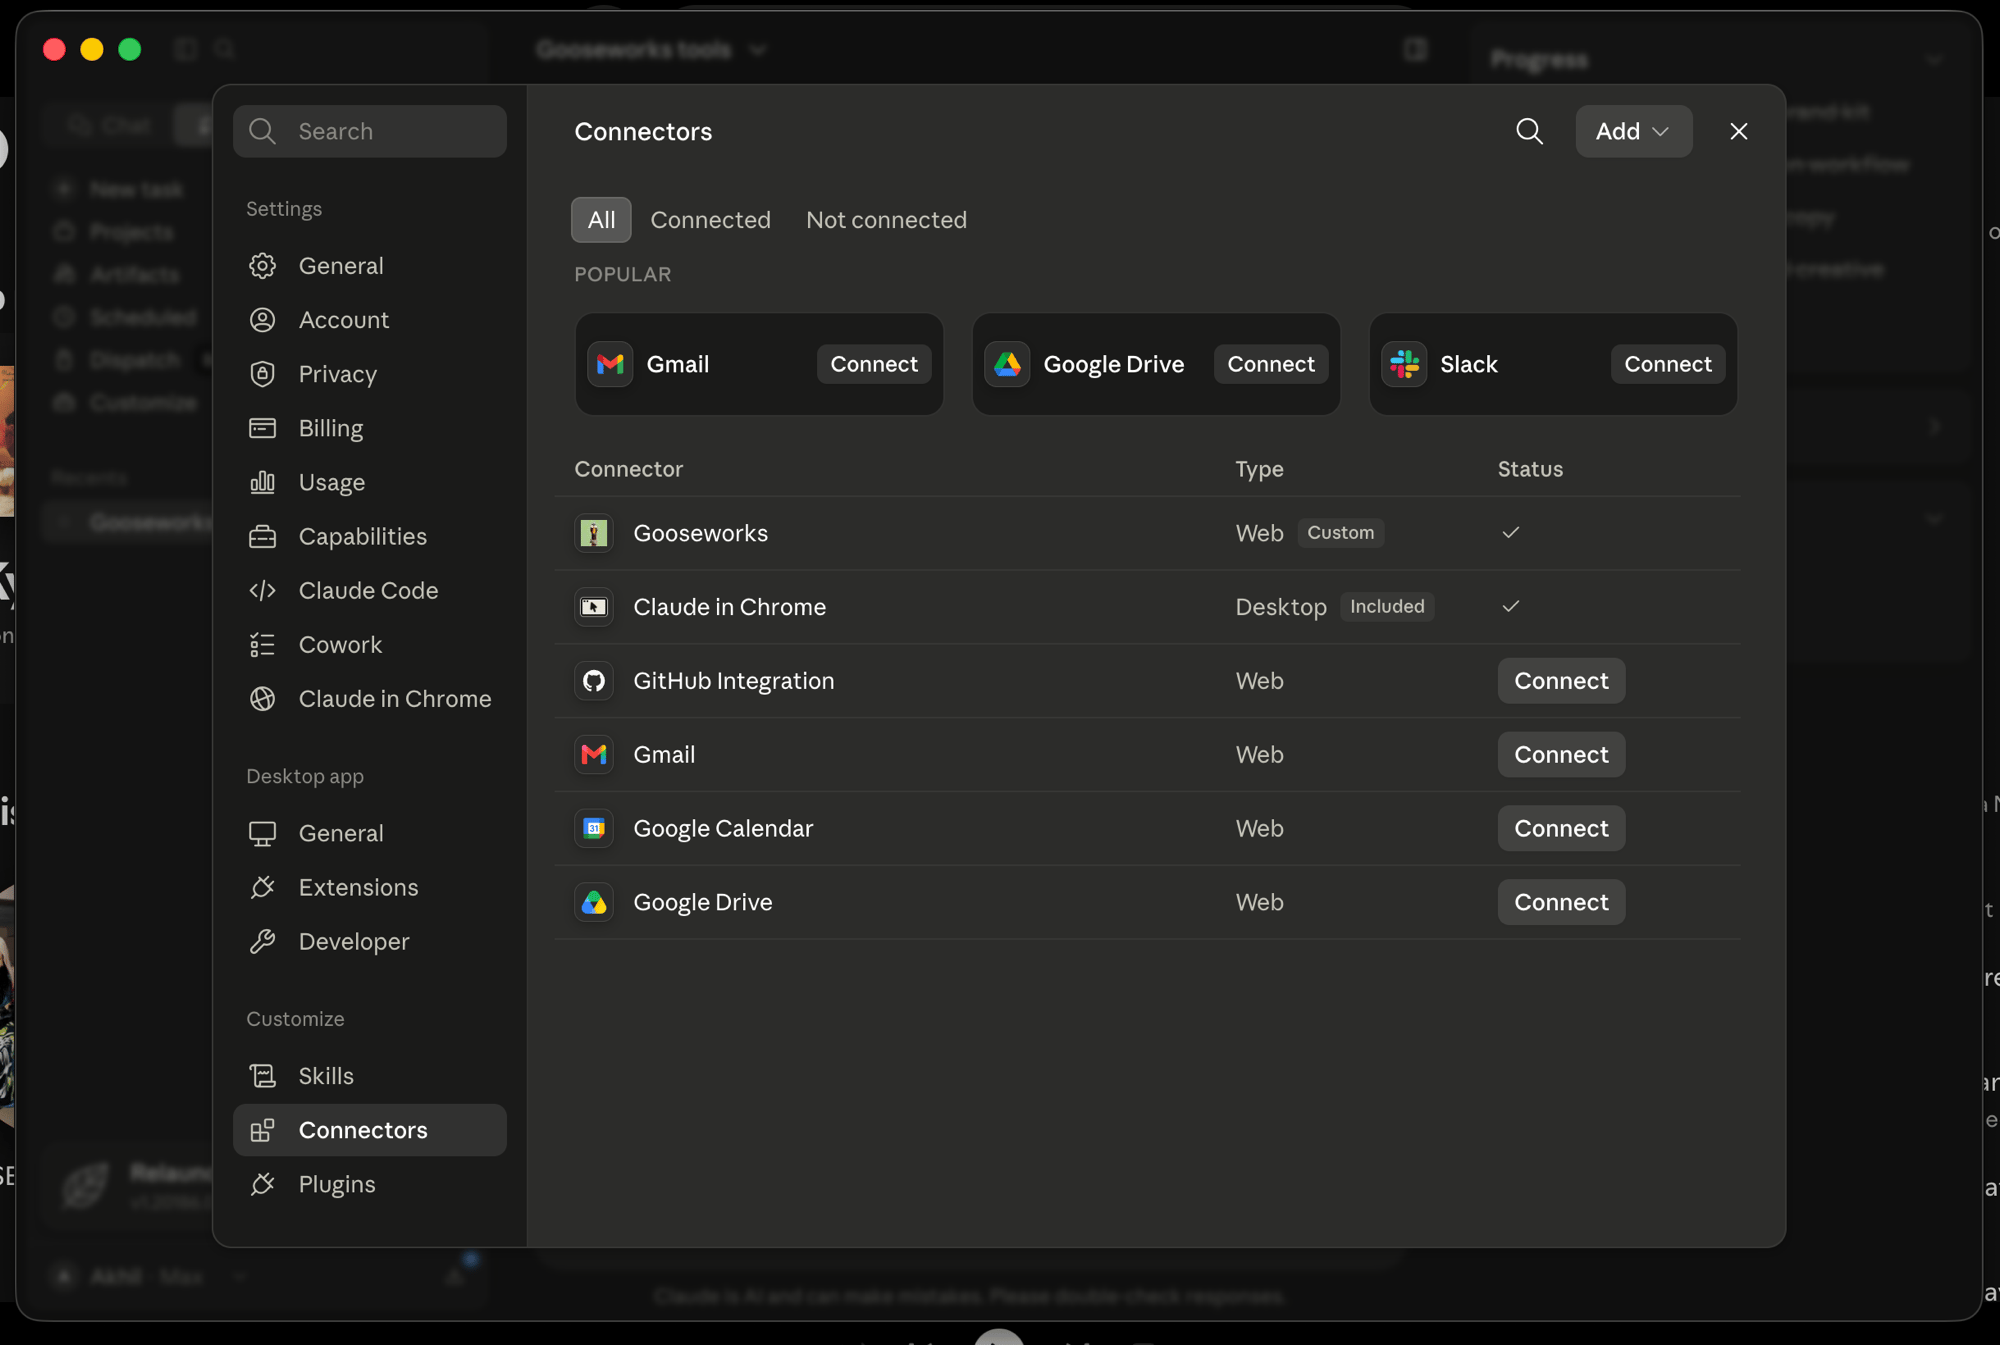
Recommended first prompt
Start a normal Claude chat or Cowork session and send:What you can do
Once connected, Claude can, on your behalf and in your account:- Make, edit & analyze ads — research a brand, turn templates into branded ads, re-roll and edit them, and check how campaigns are doing. It runs through the same system as the web app — billed to your credits.
- Work with your files, chat history & automations — the standard MCP Servers tools.
- Find & use skills — just ask Claude to find and run any GooseWorks skill.
Managing the connection
- Where it works — the connector works in both normal Claude chats and Cowork sessions once added.
- What it can do — it can use the GooseWorks tools and spend ad credits; it can’t change your account settings.
- Reconnecting — signing in again replaces the old connection, so you never build up stale access.
- Remove it — delete the connector under Settings → Connectors any time.
Troubleshooting
- “Couldn’t connect” the first time — just try again. The first request sometimes times out; a second try works.
- Stuck on sign-in or “access denied” — make sure you’re signing in with the Google account tied to your GooseWorks login, and that pop-ups aren’t blocked.
Next: make something
Now that you’re connected, the five-minute quickstart walks you from here to three finished ads, with the literal prompts to type.Using Claude Code, Cursor, or Codex instead?
Those are developer tools and take the paste-a-prompt path rather than this sign-in flow — the agent runs the CLI, which signs you in, writes the config, and verifies the connection: Paste this into your agent — Claude Code, Cursor, Codex, or a chat app like Claude or ChatGPT:--all (it sets up every coding agent on your machine at once), opens a browser for Google sign-in, checks the install, and carries on in the same chat: it sets up your brand there (it asks for your website and a couple of quick questions), then gets back to what you asked for. You don’t need to reopen your agent; the GooseWorks tools also show up in its next session. If your agent is a chat app like claude.ai, the Claude desktop app’s chat or ChatGPT, it gives you the MCP connector address instead.
The page only ever runs npx gooseworks@latest …. It writes your agent’s skills folder, your agent’s MCP config (for Cursor that is the global Cursor MCP config, plus the project’s .cursor/mcp.json if the folder has one), and ~/.gooseworks/credentials.json. The MCP config entries contain your sign-in token. It writes no other files. Installing is free; some skills spend credits when they run. The check at the end also reports whether ffmpeg and a browser are present; those only matter for rendering video ads on your machine and do not block the install.
See the CLI, or compare both paths. It’s the
same server and the same account either way.